Homemade Peanut Butter Cups Crunchy
Highlighted under: Sweet Table Classics
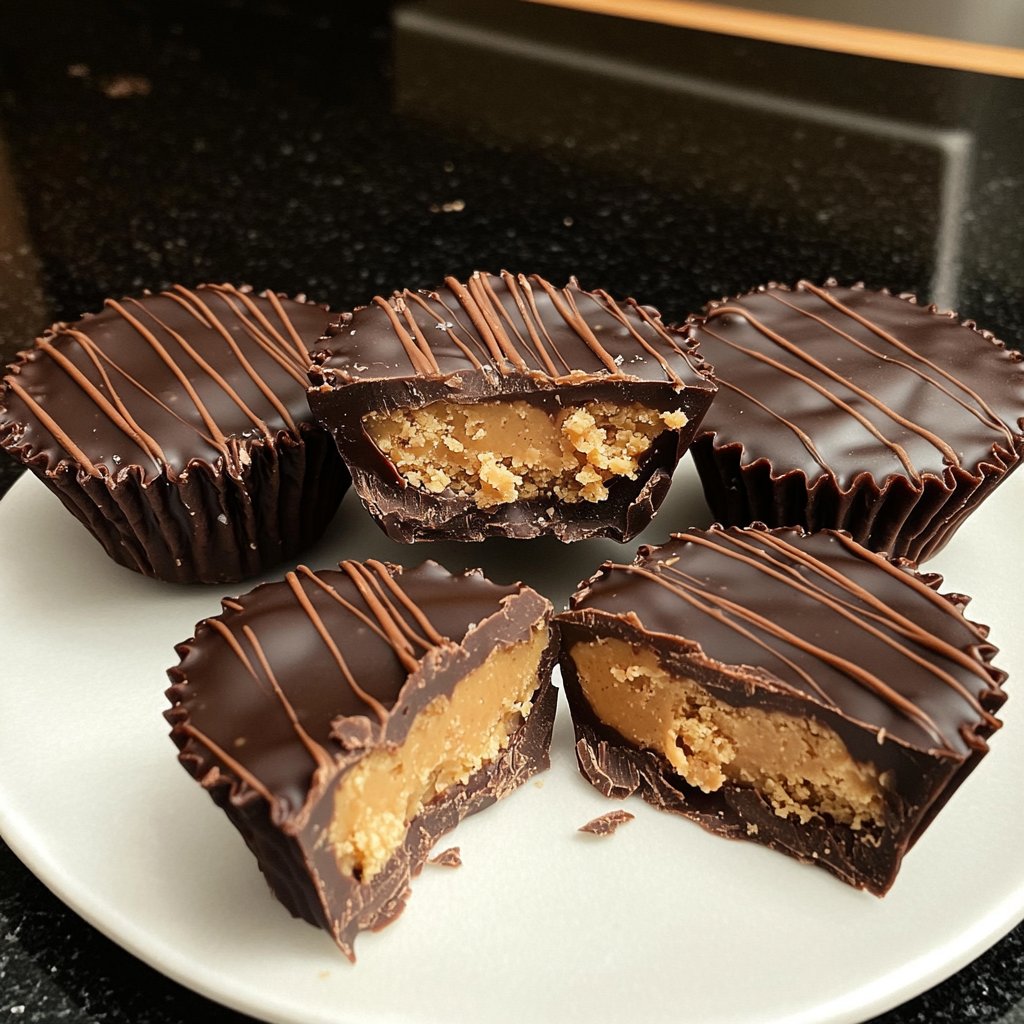
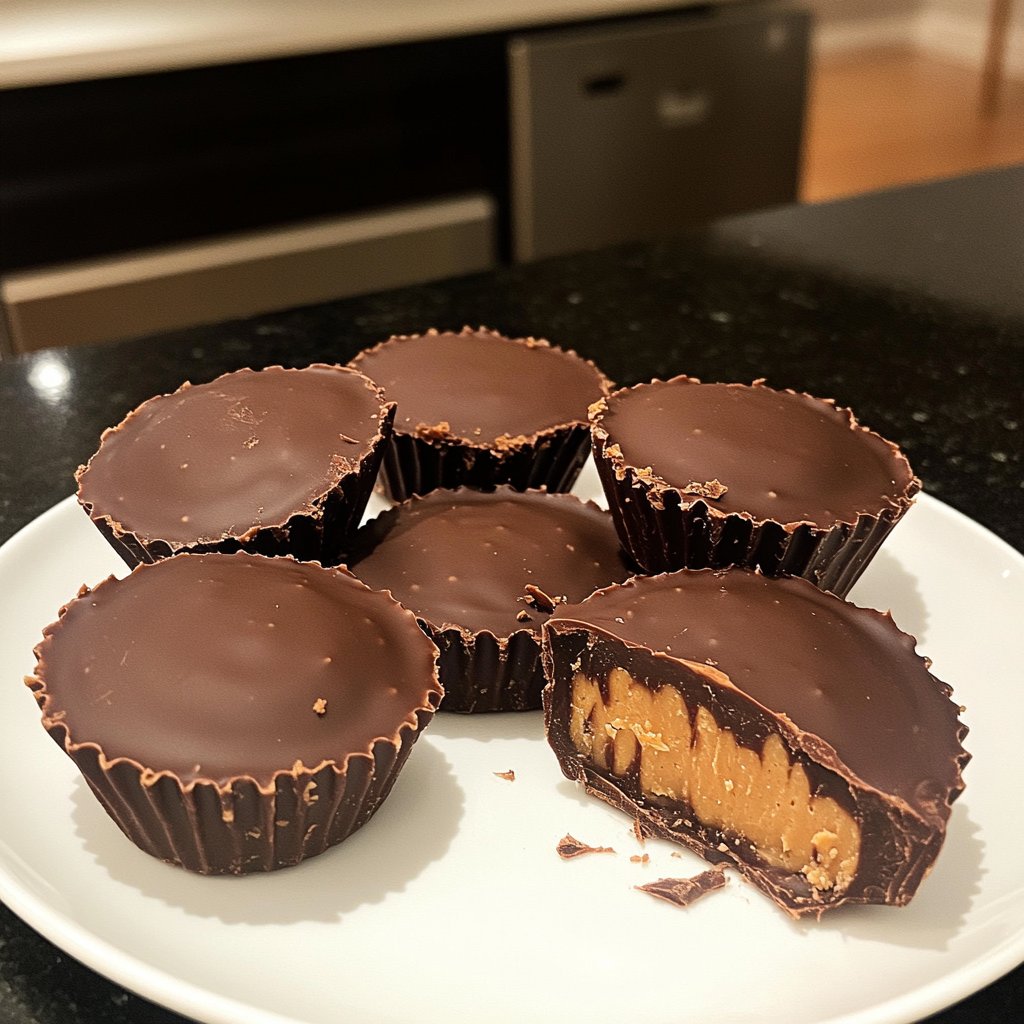
I love making my own peanut butter cups at home, and this crunchy twist takes them to a whole new level. The combination of creamy, rich peanut butter with the delightful crunch from added ingredients makes each bite a perfect balance of texture and flavor. It's a fun, straightforward process, and I always enjoy customizing the mix-ins to suit my taste. Plus, making these treats allows me to control the ingredients, ensuring they are as wholesome as they are delicious. You've got to try this recipe for a sweet, satisfying treat!
When I first attempted to make these peanut butter cups, I wanted to find a balance between richness and crunch. After several trials, I found that using a mix of creamy peanut butter and crushed nuts really elevated the flavor and texture of the cups. The melting chocolate also plays a crucial role, so I always ensure to choose high-quality chocolate. It makes all the difference in the final product!
While preparing these treats, I discovered that letting the chocolate set at room temperature instead of the fridge yields a perfect texture. It prevents the chocolate from becoming too hard, making it easier to bite into. Everyone I share these with loves them, and I can't wait for you to give them a try!
Why You'll Love This Recipe
- Rich peanut butter flavor enhanced by crispy mix-ins
- Decadent chocolate coating that compliments the crunch
- Fun and easy to make, perfect for family projects
Understanding the Ingredients
The star of this recipe is the creamy peanut butter, which forms the filling. I recommend using a natural peanut butter for a more authentic flavor and smoother texture. It's important to avoid varieties with added sugars or oils, as these can alter the consistency and sweetness of your final product. If you're looking for a lower-fat option, consider substituting part of the peanut butter with a nut-based yogurt or even a light cream cheese, but keep in mind that these may change the flavor profile slightly.
The powdered sugar serves two functions: it sweetens the filling and helps create a firmer texture when combined with the peanut butter. If you're trying to cut down on sugar, you can swap it out for a sugar-free alternative like erythritol or monk fruit sweetener; however, these may not yield the same creaminess, so you might need to experiment with the ratios.
Perfecting the Chocolate Coating
The chocolate coating not only adds a decadent finish but also helps seal in the filling. Melting the chocolate with coconut oil creates a smoother mix that’s easier to pour and provides a nice sheen once set. If you're looking for a dairy-free version, substitute with dark chocolate or a vegan chocolate alternative, keeping an eye on the melting process to prevent burning – chocolate can seize easily if heated too quickly.
When you pour the chocolate into the liners, aim for a double layer: one on the bottom and one on top. This creates a satisfying crunch and a strong barrier for the peanut butter filling. Remember to let the first layer cool slightly before adding the filling; this prevents the peanut butter from melting into the warm chocolate.
Ingredients
Ingredients for Homemade Peanut Butter Cups Crunchy
For the Cups
- 1 cup creamy peanut butter
- 1/2 cup powdered sugar
- 1/2 cup crushed nuts (e.g., peanuts or almonds)
- 1 1/2 cups milk chocolate chips
- 1 tablespoon coconut oil
Feel free to adjust the sweetness or chocolate type as per your preference!
Instructions
Instructions
Prepare the Cupcake Liners
Line a muffin tin with cupcake liners to prepare for pouring in the mixture.
Mix the Peanut Butter Filling
In a bowl, combine the creamy peanut butter, powdered sugar, and crushed nuts. Mix until smooth.
Melt the Chocolate
In a microwave-safe bowl, combine chocolate chips and coconut oil. Microwave in 30-second intervals, stirring in between, until smooth.
Assemble the Cups
Pour a spoonful of melted chocolate into each cupcake liner. Then, add a layer of the peanut butter mixture and top with more melted chocolate.
Chill and Set
Place the muffin tin in the refrigerator for about 30 minutes or until the chocolate is fully set.
Once set, enjoy your homemade crunchy peanut butter cups!
Pro Tips
- For a fun variation, try adding a sprinkle of sea salt on top of the melted chocolate for extra flavor.
Storage Tips
These homemade peanut butter cups can be stored in an airtight container in the refrigerator for up to two weeks. If you find yourself with a larger batch, consider freezing them instead. Just lay the cups on a baking tray and freeze until solid, then transfer them to a freezer-safe bag. They will keep for up to three months in the freezer. To enjoy, simply remove a couple of cups and let them sit at room temperature for about 15 minutes before eating.
Keep in mind that storing these in the refrigerator might cause the chocolate to lose its crisp texture over time. If you prefer that crunchy snap, allow them to rest at room temperature for a bit before serving, especially if they're coming out of the fridge.
Creative Variations
Feel free to experiment with different mix-ins to customize your peanut butter cups. Chopped dried fruits like raisins or cranberries can add a delightful chewiness, while seeds like chia or pumpkin can boost the nutritional value. A sprinkle of sea salt on top before the chocolate sets can also enhance the flavor, standing out beautifully against the sweetness of the filling.
If you're a fan of textures, consider adding crispy rice cereal or even crushed pretzels into the peanut butter mixture for an unexpected salty crunch. Just be sure not to overdo it; you want the peanut butter flavor to still shine through while providing that satisfying crunch.
Questions About Recipes
→ Can I use dark chocolate instead of milk chocolate?
Yes, dark chocolate works wonderfully and adds a rich flavor to the cups.
→ How should I store these peanut butter cups?
Store them in an airtight container in the refrigerator for up to two weeks.
→ Is it possible to make these vegan?
Absolutely! Use vegan chocolate and a plant-based butter substitute for a dairy-free option.
→ Can I add other fillings or toppings?
Definitely! Feel free to experiment with ingredients like crushed pretzels, dried fruit, or even a layer of caramel.
Homemade Peanut Butter Cups Crunchy
Created by: Evelyn Parker
Recipe Type: Sweet Table Classics
Skill Level: Easy
Final Quantity: 12 cups
What You'll Need
For the Cups
- 1 cup creamy peanut butter
- 1/2 cup powdered sugar
- 1/2 cup crushed nuts (e.g., peanuts or almonds)
- 1 1/2 cups milk chocolate chips
- 1 tablespoon coconut oil
How-To Steps
Line a muffin tin with cupcake liners to prepare for pouring in the mixture.
In a bowl, combine the creamy peanut butter, powdered sugar, and crushed nuts. Mix until smooth.
In a microwave-safe bowl, combine chocolate chips and coconut oil. Microwave in 30-second intervals, stirring in between, until smooth.
Pour a spoonful of melted chocolate into each cupcake liner. Then, add a layer of the peanut butter mixture and top with more melted chocolate.
Place the muffin tin in the refrigerator for about 30 minutes or until the chocolate is fully set.
Extra Tips
- For a fun variation, try adding a sprinkle of sea salt on top of the melted chocolate for extra flavor.
Nutritional Breakdown (Per Serving)
- Calories: 380 kcal
- Total Fat: 26g
- Saturated Fat: 15g
- Cholesterol: 195mg
- Sodium: 85mg
- Total Carbohydrates: 32g
- Dietary Fiber: 3g
- Sugars: 24g
- Protein: 6g