Homemade Peanut Butter Cups Crunchy
Highlighted under: Sweet Table Classics
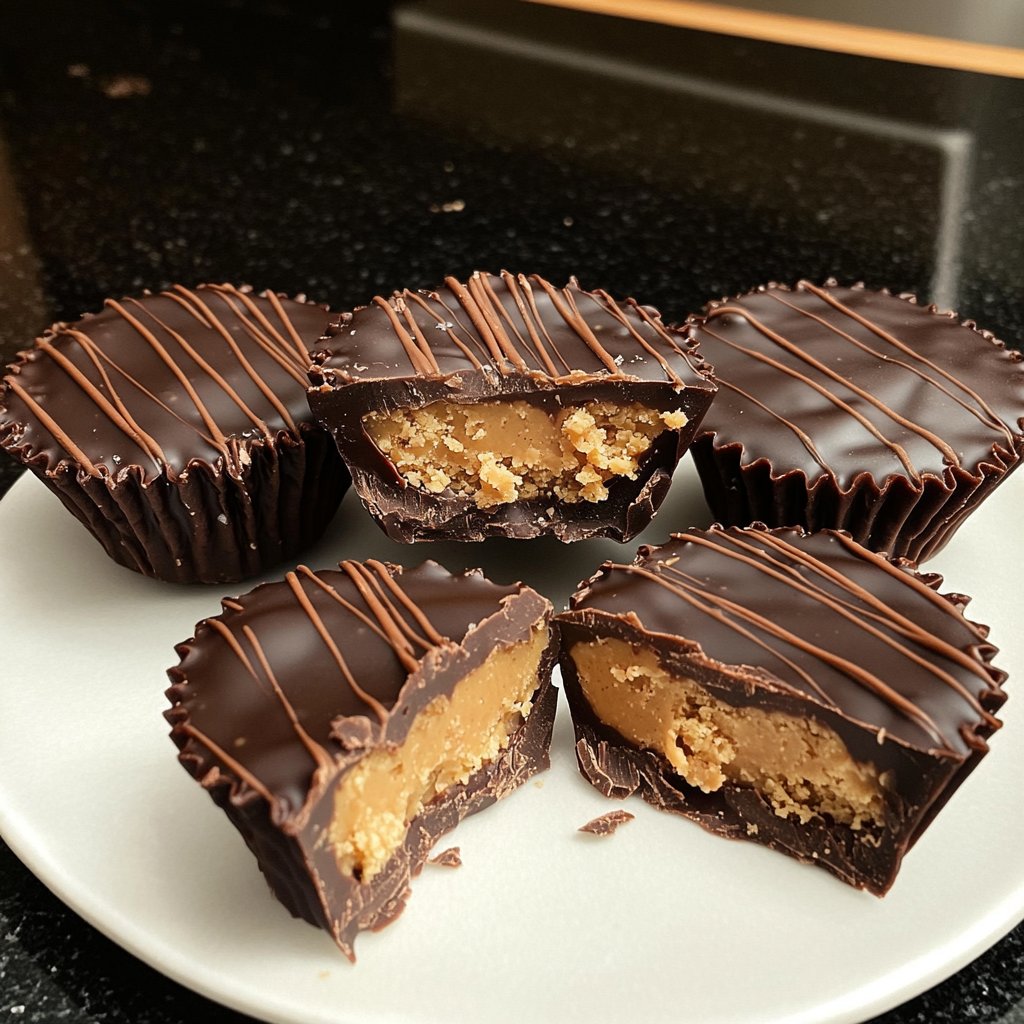
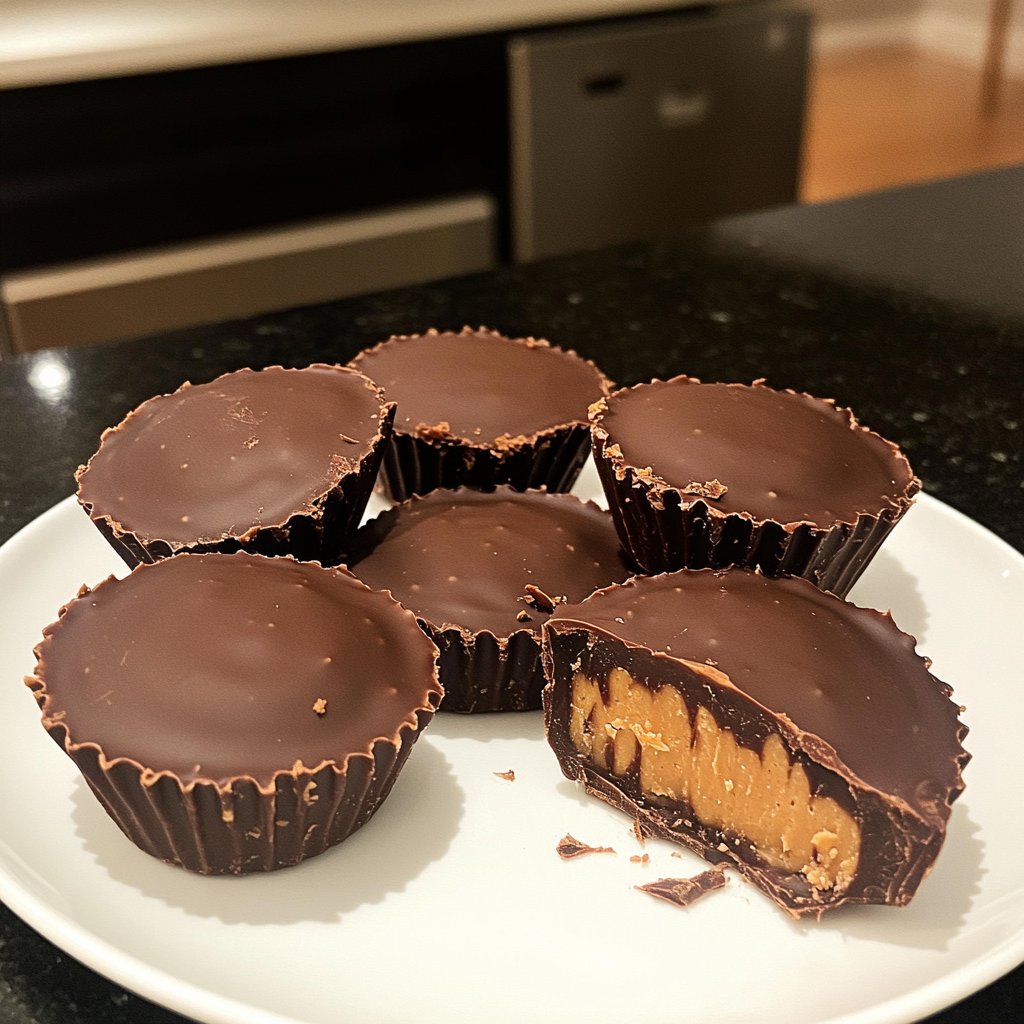
I absolutely love making homemade treats, and these Crunchy Peanut Butter Cups are one of my favorite recipes. They combine the rich flavors of chocolate with the creamy texture of peanut butter and a delightful crunch that makes every bite exciting. The best part is that I can customize them with my favorite additions, like crispy rice or chopped nuts, and they make for perfect gifts or sweet snacks. Once you try making them, you'll understand why they are so irresistible!
Creating my own peanut butter cups has been a joyful experiment in the kitchen. I started by using high-quality chocolate to make the shells, ensuring that each cup would be rich and decadent. To add the crunchy element, I incorporated crispy rice cereal, which provides a lovely texture contrast to the creamy filling.
What I love most about this recipe is its adaptability. You can easily swap out the peanut butter for almond butter or add a sprinkle of sea salt on top before they set for extra flavor. Each time I make them, I try to put a new twist on the recipe, and they always turn out delicious!
Why You'll Love This Recipe
- Rich chocolate flavor with a satisfying crunch
- Creamy peanut butter filling that's utterly delicious
- Perfectly portioned for a quick treat or dessert
The Importance of Quality Chocolate
When making these Homemade Peanut Butter Cups, the chocolate you choose significantly impacts the flavor and texture of the final product. I recommend using high-quality semi-sweet chocolate chips, as they have a balance of sweetness and richness that complements the creamy peanut butter. Avoid chocolate labeled as 'baking chocolate' unless it's specifically for melting, as those can have a different taste profile that might not blend well with the peanut butter.
Melting the chocolate carefully is equally crucial. It's best to use low heat in short intervals, stirring in between to prevent burning. If you notice any graininess, it indicates overheating. To salvage it, you can try adding a small amount of vegetable oil or cocoa butter to smooth it out, but ensure to keep the heat low next time.
Texture and Flavor Enhancements
The addition of crispy rice cereal not only brings a delightful crunch but also helps to balance out the richness of the peanut butter and chocolate. If you're looking for additional texture, consider folding in crushed pretzels or finely chopped nuts into the peanut butter mixture. These add-ins contribute a salty element that enhances the overall flavor and makes each bite more interesting.
For those who enjoy a flavor twist, feel free to experiment with different types of chocolate. Dark chocolate or milk chocolate can change the overall taste profile, providing new dimensions to your cups. You can also add a sprinkle of sea salt on top before refrigeration to enhance the chocolate's flavor and create a contrast with the sweetness.
Storing and Customizing Your Treats
These Peanut Butter Cups can be made ahead of time and stored in an airtight container in the refrigerator for up to two weeks, making them an excellent option for meal prep or planned snacks. If you're looking to keep them longer, they freeze beautifully. Just separate them with parchment paper and store in an airtight bag for up to three months. When you’re ready to enjoy, simply take them out and let them sit at room temperature for a few minutes to soften slightly.
Customization is part of the fun with these cups. Consider adding flavors like vanilla extract or a pinch of cinnamon to the peanut butter filling for a personalized touch. You can even create different layers by melting white chocolate to drizzle over the top or using flavored chocolate for a unique color scheme and added taste.
Ingredients for Crunchy Peanut Butter Cups
For the Cups
- 1 cup semi-sweet chocolate chips
- 1/2 cup creamy peanut butter
- 1/2 cup crispy rice cereal
- 1 tablespoon powdered sugar (optional)
These simple ingredients come together to make a delectable treat!
Instructions
Melt the Chocolate
In a microwave-safe bowl, melt the chocolate chips in 30-second intervals, stirring between each interval until smooth.
Prepare the Cupcake Liners
Line a muffin tin with cupcake liners and pour a small amount of melted chocolate into each liner, tilting the tin to coat the sides evenly.
Make the Filling
In a bowl, mix together the peanut butter, crispy rice cereal, and powdered sugar (if using) until well combined.
Assemble the Cups
Place a spoonful of the peanut butter mixture in the center of each chocolate-coated liner and top with more melted chocolate to cover.
Refrigerate
Refrigerate the cups for about 15 minutes or until the chocolate hardens.
Enjoy your homemade crunchy peanut butter cups!
Pro Tips
- Experiment with different types of chocolate or add a dash of sea salt on top for an extra flavor boost.
Troubleshooting Common Issues
If your chocolate isn't coating the cupcake liners smoothly, it may be too thick. Thin it out by stirring in a teaspoon of coconut oil or shortening, which will help the chocolate spread evenly. Ensure you coat the sides sufficiently to create a sturdy shell for the peanut butter filling. Moreover, remember that the temperature of the chocolate should be warm but manageable; if it's too hot, it can melt the peanut butter layer beneath.
Another issue you may encounter is the peanut butter mixture becoming too dry or crumbly. This can happen if your peanut butter is overly thick or if you don't incorporate enough crispy rice cereal. To fix this, simply add a touch more peanut butter or a drizzle of honey to achieve a creamy consistency that holds up well in your cups.
Scaling the Recipe
This recipe is easily scalable, making it simple to adjust the quantities based on your needs. If you want to double the recipe, use a larger muffin tin and ensure each layer of chocolate and filling remains consistent for the best results. Additionally, when scaling up, double-check the melting times for chocolate, as using a larger batch may require slightly longer intervals to achieve a smooth consistency.
If you're preparing these cups for a crowd or special occasion, consider creating themed variations. You can divide the filling into sections and flavor each with different extracts or mix-ins. This will not only make for a visually appealing array but also cater to a variety of tastes, enhancing the overall experience of your Homemade Peanut Butter Cups.
Questions About Recipes
→ Can I use milk chocolate instead of semi-sweet?
Yes, you can use milk chocolate for a sweeter taste.
→ How do I store the peanut butter cups?
Store them in an airtight container in the refrigerator for up to a week.
→ Can I make these with natural peanut butter?
Certainly! Just ensure that it is well-stirred to avoid excess oil.
→ What's the best way to melt chocolate?
Using a microwave in short intervals or a double boiler both work well to melt chocolate smoothly.
Homemade Peanut Butter Cups Crunchy
Created by: Evelyn Parker
Recipe Type: Sweet Table Classics
Skill Level: Beginner
Final Quantity: 12 cups
What You'll Need
For the Cups
- 1 cup semi-sweet chocolate chips
- 1/2 cup creamy peanut butter
- 1/2 cup crispy rice cereal
- 1 tablespoon powdered sugar (optional)
How-To Steps
In a microwave-safe bowl, melt the chocolate chips in 30-second intervals, stirring between each interval until smooth.
Line a muffin tin with cupcake liners and pour a small amount of melted chocolate into each liner, tilting the tin to coat the sides evenly.
In a bowl, mix together the peanut butter, crispy rice cereal, and powdered sugar (if using) until well combined.
Place a spoonful of the peanut butter mixture in the center of each chocolate-coated liner and top with more melted chocolate to cover.
Refrigerate the cups for about 15 minutes or until the chocolate hardens.
Extra Tips
- Experiment with different types of chocolate or add a dash of sea salt on top for an extra flavor boost.
Nutritional Breakdown (Per Serving)
- Calories: 120 kcal
- Total Fat: 8g
- Saturated Fat: 3g
- Cholesterol: 0mg
- Sodium: 55mg
- Total Carbohydrates: 10g
- Dietary Fiber: 1g
- Sugars: 6g
- Protein: 3g